React Native 作为 Mobile 端的跨平台方案之一,有它独特的优势。之前虽然对其有所了解,但是不够系统和深入,这次借助工作的机会,从这本《Fullstack React Native》开始,加上项目的实践,得以对 React Native 有更深的理解。
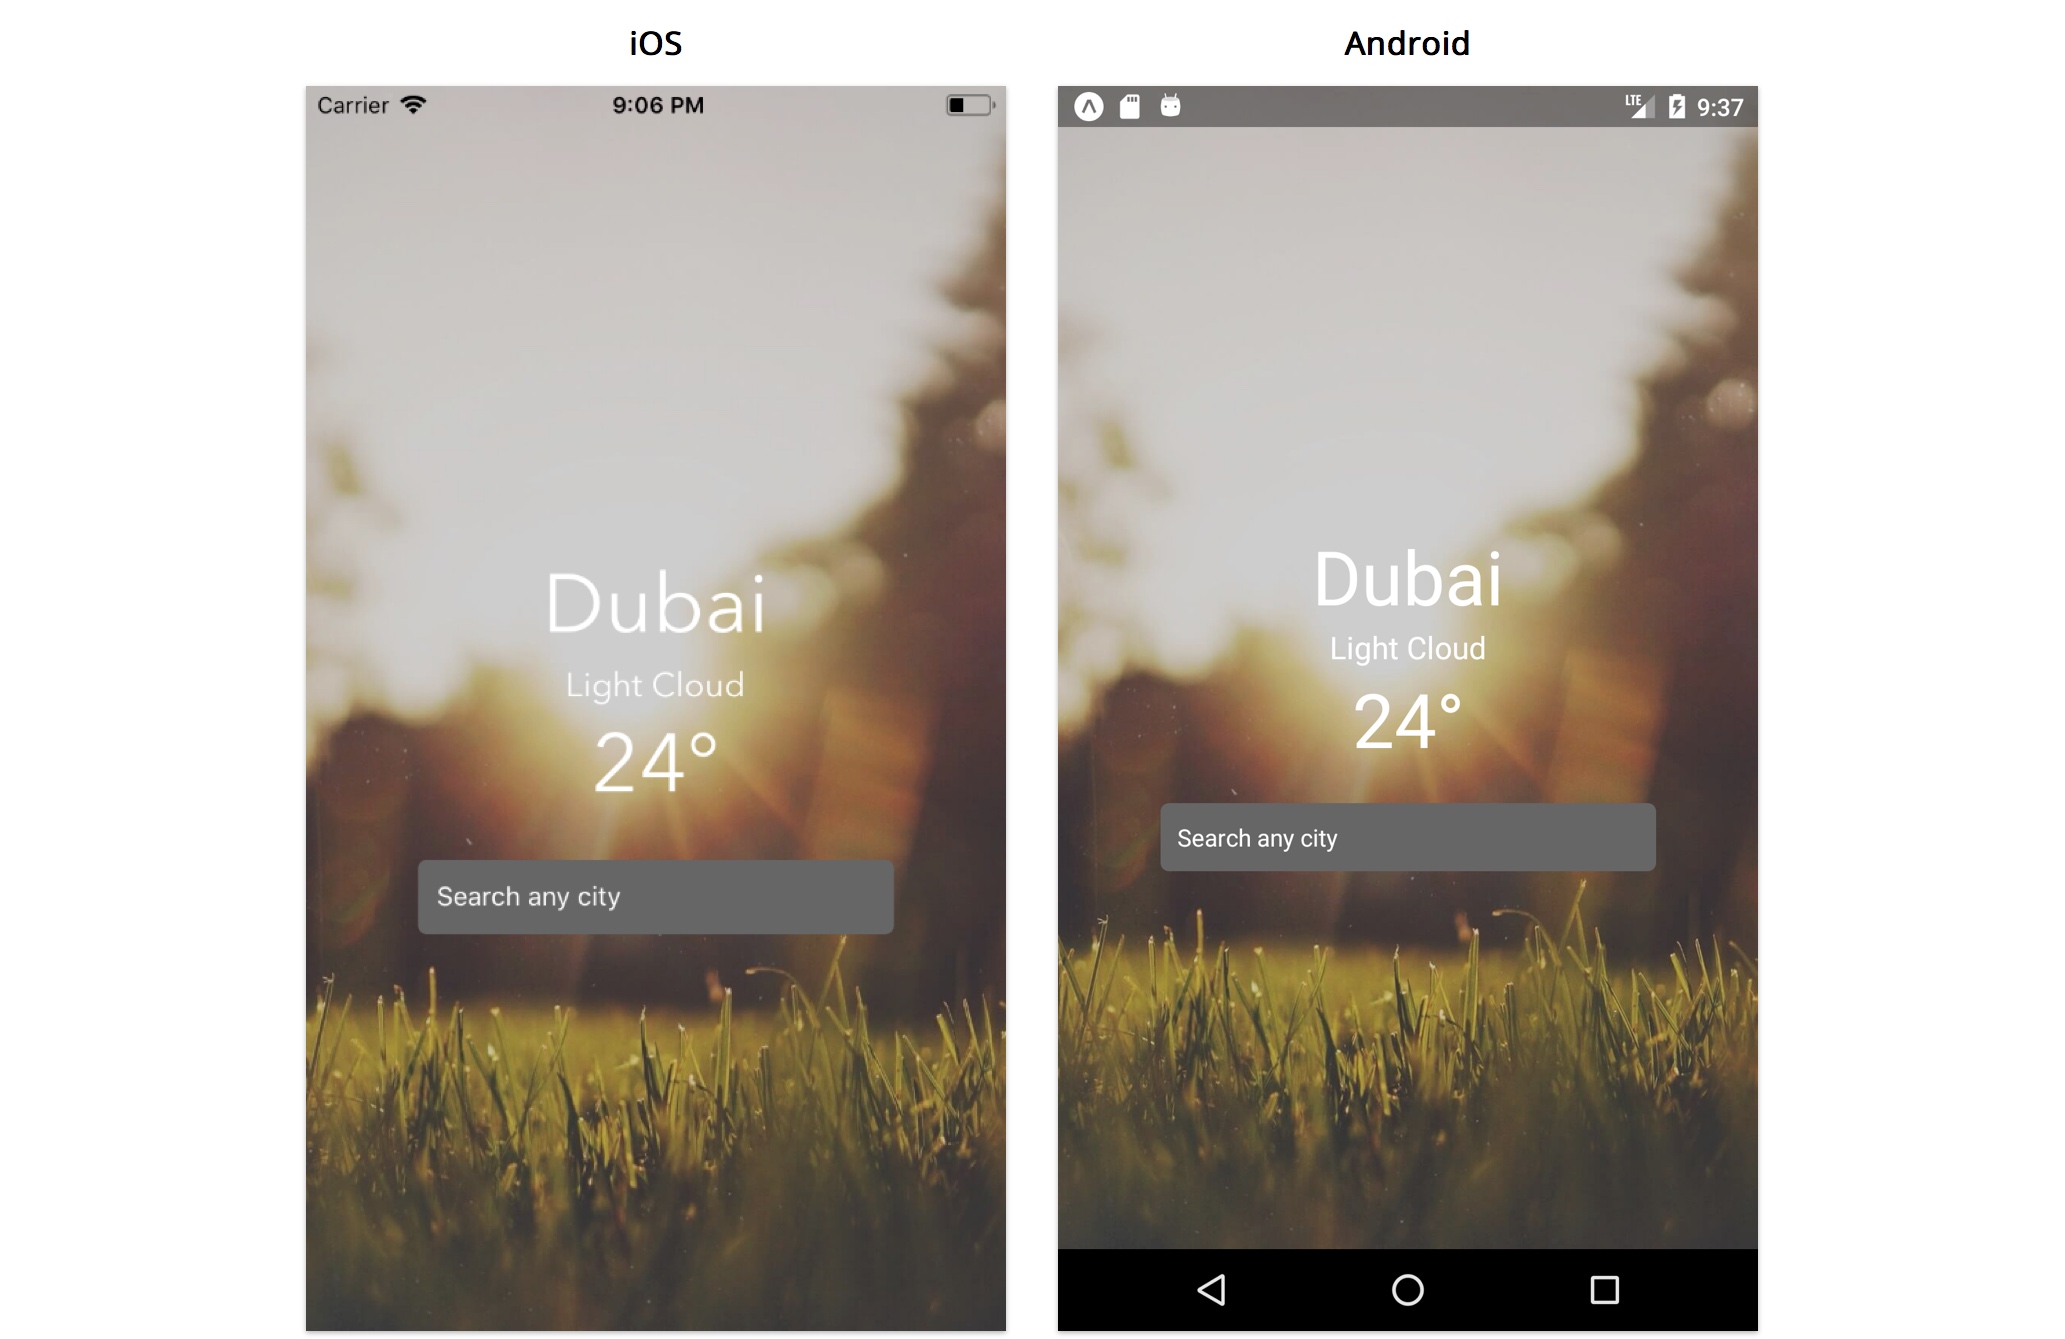
书中的第一个例子是一个天气应用,用户可以输入不同的城市,以得到相应的天气预报。
第一个 Component
App 的入口是一个名为 App.js 的文件,我们一起来看看这个组件长什么样子。
1
2
3
4
5
6
7
8
9
10
11
12
13
14
15
16
17
18
19
20
21
22
23
24
import React from 'react';
import { StyleSheet, Text, View } from 'react-native';

export default class App extends React.Component {
  render() {
    return (
      <View style={styles.container}>
        <Text>Open up App.js to start working on your app!</Text>
        <Text>Changes you make will automatically reload.</Text>
        <Text>Shake your phone to open the developer menu.</Text>
      </View>
    );
  }
}

const styles = StyleSheet.create({
  container: {
    flex: 1,
    backgroundColor: '#fff',
    alignItems: 'center',
    justifyContent: 'center',
  },
});
这里的 App 是一个继承自 React.Component 的类,这就是在 RN 里面定义组件的方式,render() 是唯一需要实现的方法,以返回需要显示的界面元素。
<View> 组件接收的 style 参数是它的 props,这是 RN 提供的自定义组件的方式,通过传入不同的 props,来提供高复用性的组件。
StyleSheet 是 RN 提供的供我们分离组件和其样式的 API,可以使代码更加整洁,便于关注业务逻辑。
Custom components
RN 提供了一些内置的组件,但是这还远远不能满足我们的需求,根据 《Atomic Design》 我们还可能会封装大量自定义的适合我们 App 的组件,下面是一个书中封装的自定义组件 SearchInput.
1
2
3
4
5
6
7
8
9
10
11
12
13
14
15
16
17
18
19
import React from 'react';
import { StyleSheet, TextInput, View } from 'react-native';

export default class SearchInput extends React.Component {
  render() {
    return (
      <View style={styles.container}>
        <TextInput
          autoCorrect={false}
          placeholder={this.props.placeholder}
          placeholderTextColor="white"
          underlineColorAndroid="transparent"
          style={styles.textInput}
          clearButtonMode="always"
        />
      </View>
    );
  }
}
它和 App.js 组件的结构看起来比较相似,主要的不同是使用了 this.props.placeholder ,这是在 RN 中数据从父组件传递到子组件的方式,就像这样子:
<SearchInput placeholder="Search any city" />
event-driven props
上面的 SearchInput 只能展示,并不能接收用户的输入反馈。这里引入了一个概念叫 event-driven props , 下面通过书中的例子,来看具体如何使用。
1
2
3
4
5
6
7
8
9
10
11
12
13
14
15
16
17
18
19
20
21
export default class SearchInput extends React.Component {
  handleChangeText = text => {

  };

  handleSubmitEditing = () => {

  };

  render() {
    return (
      <View style={styles.container}>
        <TextInput
          ...
          onChangeText={this.handleChangeText}
          onSubmitEditing={this.handleSubmitEditing}
        />
      </View>
    );
  }
}
此处的 onChangeText 和 onSubmitEditing 都是 event-driven props,它们会在特定事件触发时,调用传入的函数,具体到这里就是在每次输入的文本改变时,会调用 handleChangeText 方法,在提交更改时,调用 handleSubmitEditing 方法。
State
上面提到的 props 是被其父组件持有的,不能被修改,只能作为单向数据流从父组件向子组件传值。这就使得我们没办法将 SearchInput 的值向上传给父组件,以显示用户输入的值。
这就得用到 state,它是被组件自己持有的,可以被修改,并且在修改的时候,要调用 setState() 方法,这不仅会修改 state,还会触发组件的 re-render 方法去更新 UI。
使用 state 之后,SearchInput 看起来是这样的:
1
2
3
4
5
6
7
8
9
10
11
12
13
14
15
16
17
18
19
20
21
22
23
24
25
26
27
28
29
30
31
32
33
34
35
36
37
38
39
40
41
42
43
export default class SearchInput extends React.Component {
  constructor(props) {
    super(props);
    this.state = {
      text: '',
    };
  }

  handleChangeText = text => {
    this.setState({ text });
  };

  handleSubmitEditing = () => {
    const { onSubmit } = this.props;
    const { text } = this.state;

    if (!text) return;

    onSubmit(text);
    this.setState({ text: '' });
  };

  render() {
    const { placeholder } = this.props;
    const { text } = this.state;

    return (
      <View style={styles.container}>
        <TextInput
          autoCorrect={false}
          value={text}
          placeholder={placeholder}
          placeholderTextColor="white"
          underlineColorAndroid="transparent"
          style={styles.textInput}
          clearButtonMode="always"
          onChangeText={this.handleChangeText}
          onSubmitEditing={this.handleSubmitEditing}
        />
      </View>
    );
  }
}
在文本更改时,将其存储在 state 中,在点击提交时,调用父组件传入的 onSubmit() 方法,将 state 中的值向上传递给父组件,来完成数据的向上流动。
现在 Weather App 可以接受用户输入并且把输入的文本显示出来,界面是这样的:

但是天气信息都还是假数据,下面就介绍到了如何在 RN 里请求网络数据。
Networking
RN 里的网络请求看起来还是比较简单的,使用到的是 JS 的 await,放在 async function 中作为异步请求。这里放两个书中的例子,清晰明了:
1
2
3
4
5
6
7
8
9
10
11
12
13
14
15
16
17
18
19
20
21
export const fetchLocationId = async city => {
  const response = await fetch(
    `https://www.metaweather.com/api/location/search/?query=${city}`,
  );
  const locations = await response.json();
  return locations[0].woeid;
};

export const fetchWeather = async woeid => {
  const response = await fetch(
    `https://www.metaweather.com/api/location/${woeid}/`,
  );
  const { title, consolidated_weather } = await response.json();
  const { weather_state_name, the_temp } = consolidated_weather[0];

  return {
    location: title,
    weather: weather_state_name,
    temperature: the_temp,
  };
};
await 表达式会暂停当前 async function 的执行,等待 Promise 处理完成。若 Promise 正常处理(fulfilled),其回调的resolve函数参数作为 await 表达式的值,继续执行 async function。
上面的两个请求分别根据搜索的城市查询 locationID 以及根据 ID 查询其天气。具体的调用如下,在用户输入提交的回调中,发起异步请求,根据结果来更新 state 并刷新UI:
1
2
3
4
5
6
7
8
9
10
11
12
13
14
15
16
17
18
19
20
21
22
23
24
25
handleUpdateLocation = async city => {
  if (!city) return;

  this.setState({ loading: true }, async () => {
    try {
      const locationId = await fetchLocationId(city);
      const { location, weather, temperature } = await fetchWeather(
        locationId,
      );

      this.setState({
        loading: false,
        error: false,
        location,
        weather,
        temperature,
      });
    } catch (e) {
      this.setState({
        loading: false,
        error: true,
      });
    }
  });
};
至此,一个简单的天气应用就完成了,它非常简单,但是包括了 RN 中的几个核心要素:Component Props State Networking 。我们已经可以利用已有的知识,来完成一个单页面应用了。

Comments powered by Disqus.